Why Add Solar to Your RV?
Save on Hookup Fees
Full hookup sites run $30–$60/night. Solar pays for itself in 1–2 seasons of boondocking.
Boondock Anywhere
National forests, BLM land, and dispersed campsites open up when you're not tethered to a power pedestal.
Silence the Generator
Solar + battery bank eliminates generator noise and fuel cost for most daytime and overnight loads.
Typical RV Power Consumption
The biggest factor in sizing your system is knowing what you need to run. Most RVers need to power:
| Appliance | Peak Watts | Duty Cycle | Typical Hours/Day | Est. Wh/Day |
|---|---|---|---|---|
| 12V DC compressor fridge | 45W | 35% | 24h | ~378 Wh |
| LED lighting (3 fixtures) | 30W | 100% | 5h | 150 Wh |
| Laptop | 65W | 100% | 4h | 260 Wh |
| TV (32" LED) | 50W | 100% | 3h | 150 Wh |
| Phone charging ×2 | 40W | 100% | 3h | 120 Wh |
| Water pump | 60W | 15% | 24h | 216 Wh |
| Typical daily total | ~1,274 Wh | |||
Use our calculator to add your exact appliances and get a precise recommendation.
How Much Solar Fits on Your RV?
RV roof space varies dramatically by type. Here’s a rough guide after accounting for AC units, vents, and antennas:
Travel Trailer
400–800W
20–30 ft models
Fifth Wheel
600–1200W
Flat upper deck
Class C / B+
400–600W
Cab-over limits space
Class A
800–1600W
Largest roof area
RV Solar Panel Mounting Options
Flat Roof Mount (Z-Brackets)
The most common RV mounting method. Z-brackets bolt to the panel frame and screw into the roof with Dicor self-leveling sealant over the screws. Provides a 1–2 inch air gap for cooling. Panels sit flat — no tilt adjustment. Best for full-time travelers who move frequently.
Tilt Mounts
Adjustable tilt brackets let you angle panels 15–45° toward the sun. This can boost output by 15–25% in winter when the sun is lower. Worth the extra cost if you boondock in one spot for days or weeks. Not ideal for frequent driving — you must lay panels flat before moving.
Portable / Ground Deploy
Portable suitcase panels (100–200W) that you set up on the ground and connect via a long cable. Great as a supplement — you can angle them at the sun and place them in unshaded spots while your RV is parked in shade. Not a replacement for roof panels on larger systems.
RV Solar Panel Tips
- Use the largest panels that fit — fewer panels means fewer connections, less wiring, and fewer potential leak points on the roof. A single 400W panel replaces two 200W panels.
- Wire panels in series for MPPT controllers to reduce current and allow thinner wires. Most MPPT controllers accept up to 100V or 150V input.
- Consider snow load if you winter camp. Panels must handle the weight of accumulated snow. All standard glass-front panels handle this; some ultra-thin flexible panels may not.
- Roof sealant is critical. Any penetration through the roof must be sealed properly with Dicor self-leveling lap sealant. Re-check annually. A leak from a poorly sealed panel mount can cause thousands in water damage.
- Don’t forget the charge controller. An MPPT controller is 15–20% more efficient than PWM, especially with panels wired in series at higher voltage. It pays for itself in increased output.
Recommended System Sizes
- 200W solar (1× 200W panel)
- 100Ah LiFePO4 (1,280 Wh)
- 20A MPPT controller
- 300W pure sine inverter
Good for: short weekend trips, minimal loads (fridge + lights + phone)
- 400W solar (2× 200W panels)
- 200Ah LiFePO4 (2,560 Wh)
- 30A MPPT controller
- 1,000W pure sine inverter
Good for: full-time boondocking, all standard loads, 2–3 days of autonomy
- 800W+ solar (4× 200W panels)
- 300–400Ah LiFePO4
- 40–60A MPPT controller
- 2,000W pure sine inverter
Good for: full-time living, AC unit capable (with generator backup for heavy AC use)
RV-Specific Tips
12V vs 24V System
Most RVs come pre-wired for 12V, so a 12V system is the easiest upgrade. If you're planning a full rewire or a large (400Ah+) battery bank, 24V reduces wire sizes and losses. Stick to 12V unless you have a compelling reason to rewire.
Air Conditioning
A standard 13,500 BTU rooftop RV AC draws 1,500–2,000W. Running it from solar+battery is possible but expensive — you'd need 600W+ of solar and a large battery bank. Most full-timers use a generator for prolonged AC use and solar for everything else. Low-power 12V DC mini-split ACs (e.g., Mabru) are a newer, more efficient option.
Lithium vs AGM for RVs
LiFePO4 is the right choice for boondockers. AGM is cheaper upfront but: weighs 2–3× more, only 50% usable capacity (a 200Ah AGM = 100Ah usable), and lasts 300–500 cycles vs 3,000+ for lithium. Over 5 years, lithium is almost always cheaper.
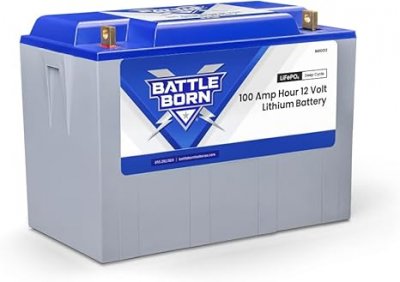
Recommended RV LiFePO4 Batteries
🇺🇸 Pricing on Amazon USDisclosure: Amazon links are affiliate links. We may earn a commission at no extra cost to you.


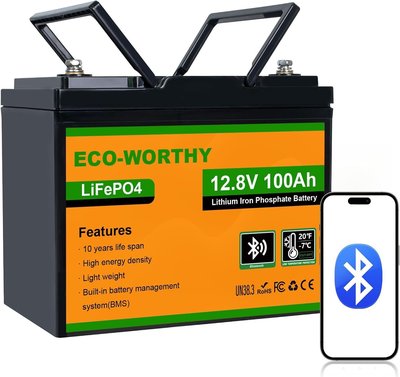
ECO-WORTHY
12V 100Ah BCI Group 24
- 1,280 Wh (100.00 Ah @ 12.80V)
Ready to size your RV solar system?
Use the RV preset in our calculator — it pre-loads typical RV appliances so you can tweak from there.
Open RV Calculator